Kleki is a free online drawing tool. It’s perfect for beginners and pros.
In this guide, you’ll learn how to use Kleki. Whether you’re an artist or just love doodling, Kleki offers a user-friendly platform. It’s accessible and doesn’t need downloads or installations. You can start drawing right away. Kleki has various tools and features, making it versatile and fun.
The interface is simple, allowing you to focus on your creativity. From sketching to adding colors, it’s all possible here. By the end of this guide, you’ll be comfortable using Kleki for your projects. Let’s dive in and explore what Kleki has to offer!
Introduction To Kleki
Welcome to the world of digital art with Kleki. If you are new to digital drawing or painting, Kleki offers an easy-to-use platform. This tool helps you create stunning art with minimal effort.
What Is Kleki?
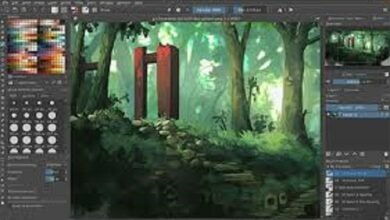
Kleki is a free online tool for digital drawing and painting. It runs in your web browser, so there’s no need to download anything. You can start creating art right away. Kleki offers a variety of brushes and tools. These help you bring your creative ideas to life. Whether you are a beginner or an experienced artist, Kleki has something for you.
Benefits Of Using Kleki
Kleki is very user-friendly. The interface is simple and intuitive. This makes it easy to navigate even for beginners. You can focus on your art without getting lost in complicated menus.
Another benefit is that Kleki is accessible from any device with internet. You can work on your art anytime, anywhere. Save your work in the cloud and continue later. This flexibility is great for busy schedules.
Kleki also offers various brushes and tools. You can create different textures and effects. This variety helps you experiment and improve your skills. Plus, you can import images to use as references or to edit them.
In summary, Kleki is a powerful yet simple tool for digital artists. Its ease of use and accessibility make it a top choice for many. Start exploring and creating with Kleki today.

Credit: kleki.com
Getting Started
Getting started with Kleki is simple and exciting. This guide will help you create your first digital masterpiece. Kleki’s user-friendly interface makes it easy for beginners and pros alike.
Creating An Account
First, visit the Kleki website. Click on the “Sign Up” button. Enter your email and choose a password. Confirm your email address. Now you have your own Kleki account!
Navigating The Interface
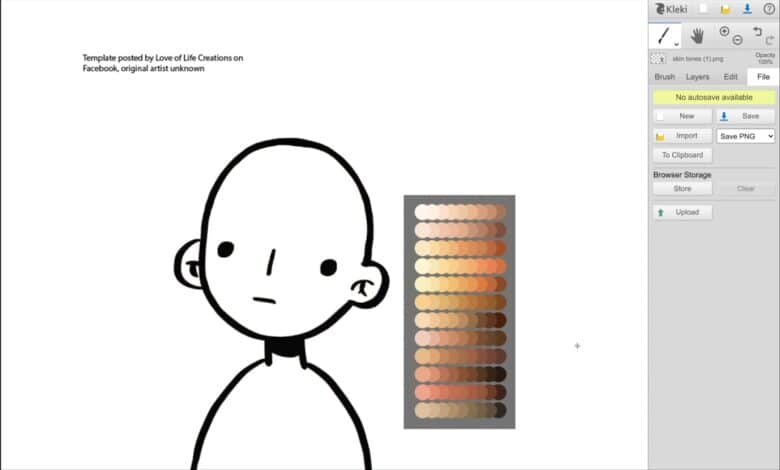
Once logged in, you will see the main workspace. The left side has the toolbar. Here, you can select brushes, colors, and shapes. The center is your drawing canvas. The right side shows layers and settings. Adjust these to suit your needs.
Experiment with different tools. Try the pencil for sketching. Use the paintbrush for coloring. Erase mistakes with the eraser tool. Combine layers to create depth in your artwork. Save your work often. Click on “File” then “Save” to keep your progress.
With practice, you will become more comfortable. Soon, you will create amazing digital art. Happy drawing!
Basic Tools
The Basic Tools in Kleki are essential for creating your digital artwork. These tools are easy to use and help you bring your ideas to life. Let’s explore some of these basic tools, starting with the Brush Tool, followed by the Eraser Tool, and finally, the Color Picker.
Brush Tool
The Brush Tool is the most fundamental tool in Kleki. It allows you to draw and paint on your canvas. You can adjust the size and opacity of the brush. This helps you create different effects and textures. Experiment with various brush styles to find the one that suits your artwork.
Eraser Tool
The Eraser Tool lets you remove unwanted marks on your canvas. It works just like the Brush Tool but in reverse. Adjust the size and opacity of the eraser for precise control. This tool is perfect for correcting mistakes and refining your artwork.
Color Picker
The Color Picker helps you choose the perfect color for your artwork. Click on the color palette to select your desired color. You can also use the eyedropper feature to pick a color directly from your canvas. This ensures color consistency throughout your artwork.
Advanced Tools
The advanced tools in Kleki are designed for users who want to create more detailed and intricate artwork. These tools provide greater control and flexibility in your drawing process. Below, we will explore some of the key advanced tools you can use in Kleki.
Layers
Layers in Kleki allow you to separate different elements of your artwork. This makes it easier to edit specific parts without affecting the rest of your drawing.
- Adding Layers: Click the “+” button to add a new layer.
- Deleting Layers: Select the layer you want to delete and click the trash icon.
- Reordering Layers: Drag and drop layers to change their order.
Using layers can help you create complex compositions and make adjustments more easily.
Blending Modes
Blending modes change how layers interact with each other. This can create various effects and enhance your artwork.
| Mode | Description |
|---|---|
| Normal | The default mode; layers do not interact. |
| Multiply | Darkens the base color by the blend color. |
| Screen | Lightens the base color by the blend color. |
Experiment with different blending modes to see how they affect your artwork.
Filters
Filters can apply various effects to your layers, adding depth and texture to your work.
- Blur: Softens the edges and reduces detail.
- Sharpen: Increases contrast and highlights details.
- Noise: Adds random pixels to create a textured effect.
Filters can enhance your artwork and bring out specific elements.
Drawing Techniques
Learning how to use Kleki can unlock many creative possibilities. Kleki offers a variety of drawing techniques for artists of all levels. Whether you are a beginner or experienced, understanding these techniques can enhance your digital art.
Line Art
Start with basic line art. Use the pen tool to create smooth lines. Adjust the brush size for thicker or thinner lines. Practice making consistent strokes. This helps create clean and professional-looking drawings.
Shading
Shading adds depth to your drawings. Use the airbrush tool for smooth gradients. Experiment with different opacity levels. Blend colors softly to create realistic shadows and highlights. This technique brings your art to life.
Adding Details
Details can make a big difference. Use the smaller brush sizes for intricate work. Add textures and patterns to enhance your drawing. Pay attention to tiny elements like hair strands or fabric folds. These details add richness and complexity to your artwork.
Credit: kleki.com
Using Shortcuts
Shortcuts can make your work on Kleki faster and more efficient. By learning and using these shortcuts, you can save time and streamline your workflow. In this section, we will explore how to use keyboard shortcuts and customize them for a better experience.
Keyboard Shortcuts
Keyboard shortcuts are key combinations that perform specific actions in Kleki. Here are some essential shortcuts you should know:
- Ctrl + Z: Undo
- Ctrl + Y: Redo
- Ctrl + C: Copy
- Ctrl + V: Paste
- Ctrl + S: Save
- Ctrl + A: Select All
These shortcuts help you manage your work without using the mouse. They are especially useful for repetitive tasks.
Customizing Shortcuts
Kleki allows you to customize shortcuts to fit your needs. Follow these steps to customize your shortcuts:
- Open the Settings menu.
- Navigate to the Shortcuts tab.
- Select the action you want to customize.
- Press the new key combination.
- Save your changes.
Customizing shortcuts can help you create a more personalized and efficient workspace. Make sure to choose combinations that are easy to remember and use frequently.
| Action | Default Shortcut | Custom Shortcut |
|---|---|---|
| Undo | Ctrl + Z | Your Custom Shortcut |
| Redo | Ctrl + Y | Your Custom Shortcut |
| Copy | Ctrl + C | Your Custom Shortcut |
By learning and customizing shortcuts, you can enhance your Kleki experience. Spend some time setting up your shortcuts to match your workflow. This will make your creative process smoother and more enjoyable.
Saving And Exporting Work
Saving and exporting your work in Kleki is simple and straightforward. You can save your projects to continue later or export them to share. This section will guide you through these processes.
Saving Projects
To save your project in Kleki, click on the “File” menu. Then select “Save Project” from the dropdown options. This will save your current work in a .kleki file format. You can reopen this file anytime to continue your project.
Saving frequently ensures you do not lose any progress. If you are working on a complex piece, save multiple versions. This way, you can go back to an earlier stage if needed.
Exporting Images
Exporting your work as an image is equally easy. Click on the “File” menu again. This time, choose “Export Image”. You will see options to export in different formats such as PNG or JPEG. Select your desired format and click “Save”.
Exported images can be shared on social media, uploaded to websites, or printed. Ensure your image resolution is set appropriately for your needs. Higher resolution is better for printing, while lower resolution works well for web use.

Credit: www.youtube.com
Tips And Tricks
Using Kleki can be a delightful experience for digital artists. This tool offers a variety of features. Learning some tips and tricks can enhance your drawing sessions. Below are some valuable insights to boost your Kleki skills.
Improving Workflow
Organize your workspace. Arrange tools for easy access. Customize your toolbar with frequently used items. This saves time and keeps your focus on creativity.
Use keyboard shortcuts. They speed up tasks like undo, redo, and switching tools. Familiarize yourself with these shortcuts to work more efficiently.
Layer management is crucial. Use layers to separate different elements of your artwork. This makes editing easier. Name your layers to avoid confusion.
Common Mistakes To Avoid
Avoid overusing filters. They can distort your image. Use them sparingly for the best results.
Don’t ignore canvas size. Starting with the right dimensions prevents quality loss. Choose a size that fits your project’s needs.
Save your work often. This prevents data loss from unexpected errors. Enable auto-save if available.
Steer clear of cluttered designs. Too many elements can overwhelm viewers. Keep your designs simple and focused.
Frequently Asked Questions
What Is Kleki?
Kleki is a free, web-based drawing and painting tool. It is user-friendly and easy to use. Kleki provides various brushes and tools.
How Do I Start Using Kleki?
To start using Kleki, visit the Kleki website. Click “Start Drawing” to begin your artwork. No registration needed.
Can I Save My Work On Kleki?
Yes, you can save your work on Kleki. Use the “Export” option to save your artwork. Choose your preferred file format.
Is Kleki Suitable For Beginners?
Yes, Kleki is suitable for beginners. It has an intuitive interface and simple tools. Ideal for both kids and adults.
Conclusion
Kleki is a great tool for digital art. Its simple interface helps beginners. You can create amazing drawings with ease. Practice often to improve your skills. Explore different features to get the best results. Share your artwork with friends and get feedback.
Remember, creativity has no limits. Enjoy using Kleki and keep drawing!