Kleki Tutorial: Master Digital Art with These Easy Steps
Digital art has never been more accessible. Kleki is a powerful, free tool for creating art online.
Whether you’re a beginner or an experienced artist, Kleki offers an intuitive platform for digital painting. This Kleki tutorial will guide you through its features, making the creative process easy and enjoyable. You don’t need advanced skills to start; Kleki is user-friendly and perfect for all levels.
With this guide, you’ll learn how to navigate the interface, use various tools, and enhance your digital art skills. Get ready to explore your artistic potential with Kleki. Let’s dive in and see what you can create!

Credit: www.youtube.com
Introduction To Kleki
Welcome to the Kleki Tutorial. Kleki is a user-friendly, web-based drawing tool. It’s great for both beginners and experienced artists. This tutorial will cover the basics of using Kleki. Let’s dive into the Introduction to Kleki.
Overview Of Tools
Kleki offers a variety of tools. Each tool helps create different effects and designs. Here’s a brief overview:
- Brush Tool: For freehand drawing and painting.
- Eraser Tool: To remove unwanted marks.
- Fill Tool: Quickly fills an area with color.
- Line Tool: Draws straight lines.
- Shape Tool: Creates geometric shapes.
Key Features
Kleki has several key features that make it stand out. These features enhance your drawing experience.
| Feature | Description |
|---|---|
| Layers | Use multiple layers to separate elements of your drawing. |
| Brush Customization | Adjust brush size, opacity, and flow for different effects. |
| Undo/Redo | Easily correct mistakes with unlimited undo and redo. |
| Import/Export | Import images or export your artwork in various formats. |
These features make Kleki a versatile tool for digital artists. Experiment with them to discover their full potential.

Credit: kleki.com
Setting Up Your Workspace
Setting up your workspace in Kleki is essential for a smooth drawing experience. A well-organized workspace can enhance your creativity and efficiency. Let’s dive into how to customize the interface and optimize settings to create the perfect environment for your digital art.
Customizing The Interface
Customizing the interface allows you to tailor Kleki to your preferences. Here’s how you can do it:
- Tool Panels: Arrange the tool panels to suit your workflow. Drag and drop them to your preferred locations.
- Canvas Size: Adjust the canvas size based on your project requirements. Go to the settings to set the dimensions.
- Color Palette: Customize the color palette. Choose colors that you frequently use and save them for easy access.
- Brush Settings: Modify brush settings. Adjust the size, opacity, and other parameters to fit your drawing style.
Optimizing Settings
Optimizing settings in Kleki can improve your drawing performance. Follow these steps to get started:
- Performance: Lower the canvas resolution if you experience lag. This makes your drawing process smoother.
- Auto-Save: Enable auto-save to prevent losing your work. Set the frequency to save at regular intervals.
- Shortcuts: Customize keyboard shortcuts for frequently used tools. This saves time and boosts productivity.
- Backup: Regularly backup your projects. Save them to your preferred cloud service or external drive.
By following these steps, you can create a personalized and efficient workspace in Kleki. Happy drawing!
Basic Drawing Techniques
Learning to draw can be a fun and rewarding experience. Kleki, a free online drawing tool, makes this process even easier. This tutorial will cover the basic drawing techniques to help you get started. You will learn how to use brushes and work with layers effectively. Let’s dive into the essentials!
Using Brushes
The brush tool is one of the most important in Kleki. It allows you to create different strokes and effects. Here’s how to make the most of it:
- Selecting a Brush: Click on the brush icon to see various options. Choose one that fits your drawing style.
- Adjusting Size and Opacity: Use the sliders to adjust the brush size and opacity. This helps create different textures and depths.
- Experimenting with Settings: Play with settings like hardness and spacing. This can add unique effects to your artwork.
Practice with different brushes to see what works best for your drawings. Remember, each brush can create a unique effect.
Working With Layers
Layers are a powerful feature in Kleki. They allow you to separate different elements of your drawing. Here’s how to use them effectively:
- Creating a New Layer: Click the ‘+’ icon to add a new layer. This helps you organize your work.
- Changing Layer Order: Drag and drop layers to rearrange them. This affects how elements overlap.
- Adjusting Layer Opacity: Use the opacity slider to make a layer more transparent. This can create subtle effects.
Layers can be used to add details, shadows, and highlights. They make editing easier and more flexible.
| Action | Shortcut |
|---|---|
| Create New Layer | Ctrl + Shift + N |
| Delete Layer | Ctrl + Shift + D |
| Merge Layers | Ctrl + E |
Using these shortcuts can speed up your workflow. Keep practicing to become comfortable with these tools.
Credit: kleki.com
Advanced Features
Kleki is a powerful online drawing tool that offers many advanced features. These features help you create stunning artwork with ease. In this section, we will explore two important advanced features: Blending Modes and Layer Masks.
Blending Modes
Blending Modes are essential for digital painting and photo editing. They allow you to change how layers interact with each other. This can add depth and texture to your artwork.
In Kleki, you can find Blending Modes in the layer settings. Here are some common Blending Modes:
- Normal: No blending, the top layer covers the bottom.
- Multiply: Darkens the colors by multiplying the base and blend colors.
- Screen: Lightens the colors by screening the base and blend colors.
- Overlay: Combines Multiply and Screen to enhance contrast.
- Soft Light: Adds a soft, subtle light effect to your layers.
Experiment with these modes to see what works best for your project.
Layer Masks
Layer Masks give you precise control over which parts of a layer are visible. This is perfect for creating complex compositions. In Kleki, you can add a Layer Mask by clicking the mask icon in the layer panel.
With Layer Masks, you can:
- Hide or reveal parts of a layer without permanent changes.
- Use black, white, and gray to control visibility.
- Edit masks using brushes and gradients for smooth transitions.
Layer Masks are non-destructive. This means you can always adjust them later. They are perfect for refining your work without starting over.
Understanding and using these advanced features can greatly enhance your digital art. So, get creative and see what you can achieve with Kleki!
Creating A Digital Sketch
Creating a digital sketch with Kleki is an exciting journey. Whether you are a beginner or an experienced artist, Kleki offers tools that are easy to use. This guide will help you create your first digital sketch. Let’s dive in!
Outlining Your Idea
Start by opening Kleki and setting up your canvas. Choose a brush that suits your style. Use light strokes to outline your idea. This is your sketch’s foundation. Keep it simple and focus on the main shapes. Don’t worry about details yet. Just get the basic structure down.
Adding Details
Once your outline is ready, zoom in to add details. Switch to a smaller brush for precision. Focus on one section at a time. Add texture and depth with different brush strokes. Use layers to separate different elements. This helps in managing your sketch better.
Pay attention to light and shadows. They add realism to your sketch. Experiment with different shades and tones. Don’t rush this step. Take your time to refine your sketch. The more details you add, the more lifelike your sketch will appear.
Coloring Your Artwork
Coloring your artwork is a crucial step in the creative process. It brings your sketches to life. Kleki offers an array of tools to make this easy and fun. Let’s dive into the basics of choosing a color palette and applying colors to your masterpiece.
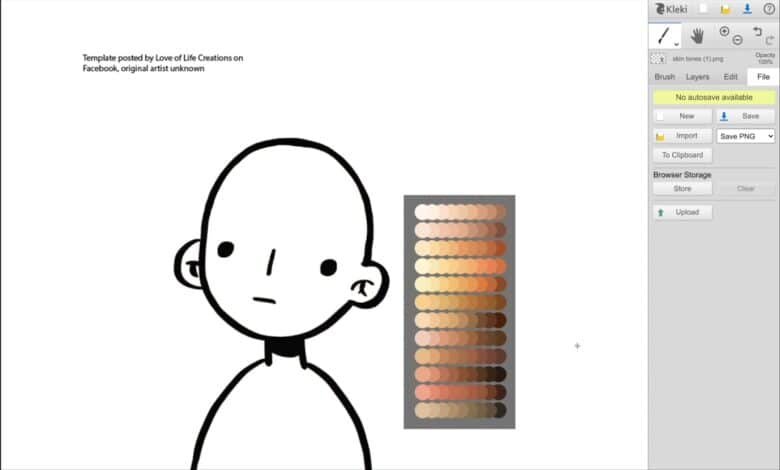
Choosing A Color Palette
Choosing the right color palette is vital. It sets the mood of your artwork. Kleki provides a color wheel to help you select colors. Start by picking a primary color. Then, choose complementary colors. This ensures harmony in your artwork. Experiment with different shades and tones. This can add depth to your piece.
Applying Colors
Applying colors is straightforward in Kleki. Use the brush tool to fill large areas. Adjust the brush size for finer details. Layers can help organize your work. Use separate layers for different parts of your drawing. This allows for easy adjustments later. Blend colors using the smudge tool. This can create smooth transitions.
Don’t forget to use the undo button if needed. It helps correct mistakes without hassle. Take your time. Coloring should be an enjoyable experience. Enjoy seeing your artwork come to life with every stroke.
Adding Textures And Effects
Adding textures and effects to your digital art can make it stand out. In this tutorial, we will explore how to use Kleki to add various textures and effects. This guide will cover two main features: using texture brushes and applying filters. These techniques can help you create more dynamic and interesting artworks.
Using Texture Brushes
Texture brushes in Kleki allow you to add unique patterns to your artwork. These brushes come in various styles and can be customized to fit your needs. Here’s how you can use them:
- Select the Brush Tool from the toolbar.
- Click on the Brush Settings to open the brush options.
- Choose a texture brush from the available options.
- Adjust the brush size and opacity to suit your artwork.
- Start painting on your canvas to see the texture effect.
Experiment with different brushes and settings to find the perfect texture for your artwork. You can combine multiple textures to achieve a unique look.
Applying Filters
Filters can dramatically change the appearance of your artwork. Kleki offers a variety of filters to enhance your designs. Follow these steps to apply filters:
- Finish painting your base artwork.
- Go to the Filters menu at the top of the screen.
- Browse through the available filters and select one to apply.
- Adjust the filter settings using the provided sliders.
- Click Apply to see the changes on your artwork.
Some popular filters include Blur, Sharpen, and Color Adjustments. Each filter offers different settings to customize your effect. You can layer multiple filters to create complex effects.
By mastering these tools, you can add depth and interest to your digital art. Kleki makes it easy to experiment with textures and effects, allowing you to bring your creative vision to life.
Final Touches And Exporting
After creating your artwork on Kleki, it’s time to add the final touches. This step is crucial. It can make your art look polished. You will also learn how to save and export your work. This ensures you can share it or continue working on it later.
Refining Your Artwork
Zoom in to check for small errors. Fix any stray lines or rough edges. Use the eraser tool to clean up your work. Adjust colors to make them pop. Play with the opacity to create depth. These small changes can make a big difference.
Saving And Exporting Files
Once you are happy with your artwork, save it. Click on the “File” menu. Choose “Save” to store your file on your device. To export, select “Export”. Choose the file format that suits your needs. JPEG and PNG are common choices. Your artwork is now ready to share or print.
Frequently Asked Questions
What Is Kleki Used For?
Kleki is a free, web-based drawing tool. It is used for creating digital art, sketches, and illustrations. Users can access it directly from their browser.
How Do I Start Using Kleki?
To start using Kleki, visit the Kleki website. No download or sign-up is required. Simply click on the canvas to begin drawing.
Can I Save My Artwork On Kleki?
Yes, you can save your artwork on Kleki. Use the “Save” button to download your creation. You can save in PNG or PSD formats.
Does Kleki Have Layers?
Yes, Kleki supports layers. Layers help organize and edit parts of your drawing individually. Use the layers panel to add, delete, or merge layers.
Conclusion
Learning to use Kleki can be fun and rewarding. With practice, your digital art skills will improve. Remember to experiment with the tools available. Don’t be afraid to make mistakes. Each stroke brings you closer to your vision. Keep creating and enjoy the process.
Happy drawing!