
In the world of digital art, drawing Kleki art has become a popular way for artists of all skill levels to express their creativity. Kleki is a free, browser-based drawing tool that offers a simple yet powerful platform for creating stunning artwork. Whether you’re a beginner or an experienced artist, this guide will walk you through everything you need to know about drawing Kleki art, from getting started to mastering advanced techniques.
What Is Kleki?
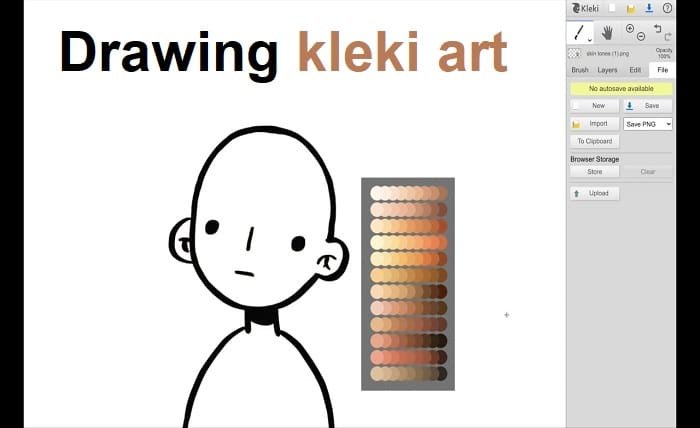
Kleki is an online drawing tool that allows users to create digital art directly in their web browser. Unlike traditional drawing software, Kleki doesn’t require any downloads or installations, making it accessible to everyone. When it comes to drawing Kleki art, the platform offers a range of brushes, layers, and editing tools that rival more complex programs.
Why Choose Kleki for Digital Art?
There are several reasons why artists choose Kleki for drawing Kleki art:
- Ease of Use: Kleki’s intuitive interface makes it easy for beginners to start creating right away.
- Accessibility: Since it’s browser-based, you can use Kleki on any device with an internet connection.
- Free to Use: Kleki is completely free, making it an excellent choice for artists on a budget.
- Versatility: Despite its simplicity, Kleki offers advanced features like layers and blending modes.
Getting Started with Drawing Kleki Art
If you’re new to drawing Kleki art, follow these steps to get started:
- Visit the Kleki Website: Open your browser and go to the Kleki homepage.
- Choose Your Tools: Familiarize yourself with the brush, eraser, and color picker tools.
- Experiment with Layers: Use layers to separate different elements of your artwork.
- Start Drawing: Begin with simple sketches and gradually explore more complex designs.
Essential Tools for Drawing Kleki Art
To create stunning drawing Kleki art, you’ll need to master the following tools:
- Brushes: Kleki offers a variety of brush types, including pencil, ink, and airbrush.
- Eraser: Use the eraser to correct mistakes or refine your artwork.
- Color Picker: Choose from a wide range of colors to bring your art to life.
- Layers: Layers allow you to work on different parts of your artwork independently.
Tips for Creating Stunning Kleki Art
Here are some tips to help you improve your drawing Kleki art:
- Practice Regularly: The more you draw, the better you’ll become.
- Use References: Study real-life objects or photos to improve your accuracy.
- Experiment with Brushes: Try different brush types to discover new styles.
- Focus on Composition: Pay attention to how elements are arranged in your artwork.
Advanced Techniques for Drawing Kleki Art
Once you’ve mastered the basics, try these advanced techniques for drawing Kleki art:
- Blending Colors: Use the smudge tool to blend colors seamlessly.
- Adding Textures: Experiment with different brush settings to create textures.
- Using Layers for Depth: Place background elements on lower layers and foreground elements on higher layers.
- Creating Shadows and Highlights: Add depth to your artwork by incorporating shadows and highlights.
Common Mistakes to Avoid When Drawing Kleki Art
Even experienced artists can make mistakes when drawing Kleki art. Here are some common pitfalls to avoid:
- Overloading Layers: Too many layers can make your artwork difficult to manage.
- Ignoring Composition: Poor composition can detract from an otherwise great piece.
- Skipping Practice: Regular practice is essential for improvement.
- Using Too Many Colors: Stick to a cohesive color palette to maintain harmony.
How to Share Your Kleki Art
Once you’ve created a masterpiece, you’ll want to share it with the world. Here’s how to share your drawing Kleki art:
- Export Your Artwork: Save your artwork as a PNG or JPEG file.
- Share on Social Media: Post your art on platforms like Instagram, Twitter, or Pinterest.
- Join Online Communities: Share your work in digital art forums or groups.
- Get Feedback: Ask for constructive criticism to improve your skills.
The Benefits of Drawing Kleki Art
Drawing Kleki art offers numerous benefits, including:
- Improved Creativity: Digital art allows you to experiment with new ideas and techniques.
- Stress Relief: Drawing can be a relaxing and therapeutic activity.
- Skill Development: Regular practice helps you improve your artistic skills.
- Portfolio Building: Create a portfolio of your work to showcase your talent.
The Future of Digital Art with Kleki
As technology continues to evolve, the possibilities for drawing Kleki art are endless. Here’s what the future might hold:
- Enhanced Tools: Kleki may introduce new brushes, effects, and editing features.
- Collaboration Features: Artists could collaborate in real-time on the same canvas.
- Mobile Optimization: Improved mobile compatibility for drawing on the go.
- AI Integration: Artificial intelligence could assist with color matching and design suggestions.
Conclusion
Drawing Kleki art is a rewarding and accessible way to explore your creativity. Whether you’re a beginner or an experienced artist, Kleki offers the tools and flexibility you need to create stunning digital artwork. By following the tips and techniques outlined in this guide, you’ll be well on your way to mastering the art of drawing Kleki art.
FAQs
1. What is Kleki?
Kleki is a free, browser-based drawing tool that allows users to create digital art without any downloads or installations.
2. Is Kleki suitable for beginners?
Yes, Kleki’s intuitive interface makes it perfect for beginners who are new to drawing Kleki art.
3. What tools does Kleki offer?
Kleki provides brushes, an eraser, a color picker, and layers to help you create detailed artwork.
4. Can I share my Kleki art online?
Absolutely! You can export your artwork and share it on social media or digital art communities.
5. How can I improve my Kleki art skills?
Practice regularly, experiment with different tools, and seek feedback from other artists to improve your drawing Kleki art