
Mastering the Art of Drawing with Kleki: A Comprehensive Guide
If you’re an aspiring artist or a digital art enthusiast, you may have come across Kleki, a popular online drawing tool. Whether you’re just starting your creative journey or looking for a new platform to enhance your skills, Kleki offers a simple and intuitive interface that caters to artists of all levels. In this guide, we’ll explore everything you need to know about drawing with Kleki, from basic features to advanced techniques, helping you unlock your creative potential.
Kleki is a free, web-based drawing application that allows users to create stunning artwork directly in their browser. With its user-friendly design and wide array of tools, Kleki is perfect for digital drawing, sketching, and painting. Throughout this article, we’ll show you how to use Kleki to create beautiful drawings, share helpful tips, and explain its various features.
How Kleki Works: Understanding the Basics of Drawing Kleki
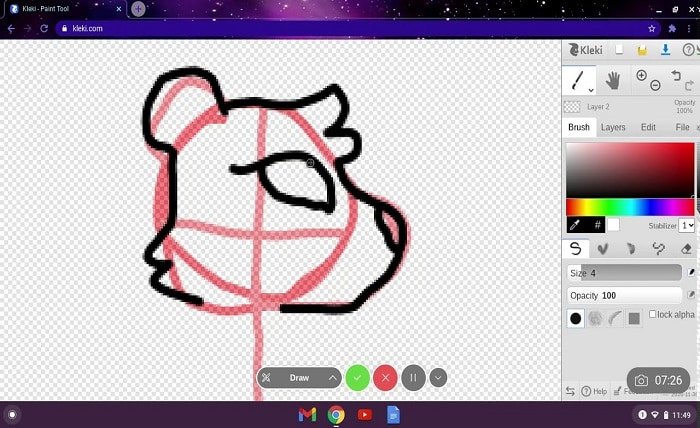
Before you begin drawing with Kleki, it’s essential to understand the basics of the tool. Kleki’s layout is straightforward, making it an ideal choice for beginners and experienced artists alike. The interface consists of several key areas: the canvas, toolbar, and settings menu.
- Canvas: This is where all the magic happens. It’s the area where you can draw, paint, and create your artwork.
- Toolbar: Located on the left, this section gives you access to various drawing tools such as brushes, erasers, and shapes.
- Settings Menu: The settings menu allows you to adjust the canvas size, undo/redo actions, and manage layers.
To get started with drawing in Kleki, simply open the website, create a new canvas, and begin using the tools available. Kleki’s toolbar includes a wide variety of brushes for different effects, from basic pencils to more intricate airbrush tools. You can also add multiple layers to separate different elements of your artwork, allowing for greater flexibility in your design.
Drawing Kleki: Tools and Features for Beginners
When it comes to drawing with Kleki, understanding the different tools available will help you unlock your artistic potential. Let’s take a closer look at some of the primary tools and features:
- Brushes: Kleki offers a selection of brushes, each providing a unique effect. The default pencil brush is great for sketches, while the airbrush tool creates soft, blended lines. You can also adjust the size and opacity of the brushes to suit your drawing style.
- Layers: One of Kleki’s standout features is its ability to work with layers. This allows you to separate different elements of your drawing, making it easier to make adjustments without affecting other parts of the artwork.
- Shapes: You can use the shape tool to draw simple shapes like circles, squares, and lines. This feature is especially useful for creating clean lines and geometric designs.
- Eraser: Just like with traditional drawing, the eraser tool allows you to correct mistakes or refine your work. Kleki’s eraser can also be customized to different sizes and opacities for precise editing.
- Color Picker: Kleki includes a color palette that lets you choose from a wide range of colors. You can also input custom RGB or HEX values for exact colors, allowing for greater precision.
Each of these tools plays a vital role in creating your artwork, and experimenting with them will give you a better understanding of their capabilities.
Advanced Drawing Techniques with Kleki
Once you’ve familiarized yourself with the basics of drawing with Kleki, it’s time to take your skills to the next level. Kleki offers various advanced techniques that can elevate your artwork and add complexity to your designs. Here are some tips to enhance your drawing experience:
- Using Multiple Layers for Complex Designs: One of the best ways to organize your artwork in Kleki is by utilizing multiple layers. By keeping different elements on separate layers, you can make edits without affecting the entire drawing. For instance, you can have a background layer, a foreground layer, and a character layer.
- Experimenting with Opacity: The opacity slider is an essential feature when drawing with Kleki. By lowering the opacity of a brush or layer, you can create a more translucent effect. This is especially useful for shading or creating softer lines.
- Blending and Smudging: Kleki offers a variety of brushes that simulate traditional art techniques, including blending and smudging. By adjusting the settings of your brush, you can blend colors smoothly to achieve gradients or even create a realistic painting effect.
- Using the Selection Tool: The selection tool allows you to isolate specific areas of your artwork, making it easier to manipulate or adjust individual elements. This tool is particularly helpful when resizing or rotating parts of your drawing.
- Applying Filters and Effects: Kleki includes some basic filters that can add visual effects to your artwork. For example, you can apply a blur effect to soften certain areas of your drawing or use the noise filter to add texture.
By mastering these advanced techniques, you’ll be able to create more detailed and dynamic artwork in Kleki.
Tips for Perfecting Your Drawing Kleki Skills
If you want to truly excel in drawing with Kleki, it’s important to practice regularly and experiment with different techniques. Here are some tips to help you improve your digital drawing skills:
- Start with Simple Sketches: If you’re new to digital art, begin by sketching simple shapes and figures. Don’t worry about perfection; focus on getting comfortable with the tools and layout.
- Use Reference Images: Drawing from reference images can greatly improve your accuracy and help you better understand proportions and anatomy. Use online resources or your own photographs to guide your drawing.
- Learn About Digital Art Techniques: There’s a wealth of online tutorials available for learning digital art techniques. While Kleki is simple to use, applying techniques such as layering, shading, and texturing will give your drawings more depth and dimension.
- Join Online Communities: Sharing your artwork and receiving feedback from other artists can help you grow. Consider joining online drawing communities, where you can participate in challenges, share tips, and connect with other artists who use Kleki.
- Experiment with Different Styles: Digital art offers endless possibilities for creativity. Don’t be afraid to try out different styles, whether it’s cartoonish, realistic, or abstract. The more you experiment, the more you’ll discover what works for you.
The Role of Drawing Kleki in Professional Art Creation
While Kleki is an excellent tool for beginners and hobbyists, it also offers a surprising amount of functionality for professional digital artists. Kleki’s simple interface and powerful tools make it an excellent option for artists who prefer working in a web browser rather than downloading expensive software.
Professional artists can take advantage of Kleki’s customizable brushes, layering system, and color controls to create detailed, polished artwork. Furthermore, Kleki allows for quick sketching and concept art, making it a great option for those who need to work on-the-go or in a hurry.
Additionally, Kleki’s accessibility means that artists can work on projects without needing a high-end computer or extensive software knowledge. All you need is an internet connection and a web browser to get started, making Kleki an attractive choice for artists looking for simplicity and ease of use.
Conclusion
Drawing with Kleki is an incredibly versatile experience that can suit any artist, regardless of skill level. Whether you’re a beginner just starting to explore digital art or a seasoned artist looking for a simple yet effective tool, Kleki offers a wide range of features to help you create stunning artwork. By familiarizing yourself with the tools, experimenting with techniques, and continuing to practice, you can master the art of drawing in Kleki and unlock your creative potential.
Kleki is more than just a drawing tool—it’s a gateway to a world of digital art possibilities. With its intuitive interface, powerful tools, and wide array of features, Kleki empowers artists to create, explore, and experiment with their craft. So, what are you waiting for? Start drawing with Kleki today and unleash your inner artist.
FAQs
1. What is Kleki and how do I use it for drawing?
Kleki is a free, web-based digital drawing tool. It’s easy to use and provides a variety of brushes, layers, and other tools to help create artwork directly in your browser.
2. Can I use Kleki on my phone or tablet?
Yes, Kleki works on mobile devices and tablets. You can access the website through your browser and use the drawing tools on a touch screen.
3. Does Kleki have a layer system?
Yes, Kleki offers a layer system that allows you to separate different elements of your drawing, making it easier to edit and adjust individual parts of your artwork.
4. Is Kleki free to use?
Yes, Kleki is completely free to use. You can access it directly through your web browser without needing to download any software.
5. What should I do if Kleki is not working?
If you encounter issues with Kleki, ensure your browser is up to date and check your internet connection. You may also want to try clearing your browser cache or restarting the page.