Drawing Easy Step by Step: Master Simple Techniques Today

Drawing is a fun and relaxing activity. Anyone can learn to draw with simple steps.
In this blog post, we’ll guide you through drawing easy step by step. Whether you are a beginner or looking to improve, these steps will help you create amazing drawings. Drawing can boost your creativity and provide a sense of accomplishment.
With clear instructions and simple techniques, you’ll find it easier than you thought. So, grab your pencil and paper. Let’s start this creative journey together!
Introduction To Easy Drawing
Drawing can be a relaxing and
. With simple steps, anyone can start drawing. This guide will introduce you to easy drawing techniques. You will learn the benefits of drawing, the basic materials needed, and how to get started.
Benefits Of Learning To Draw
Learning to draw has many benefits. It improves creativity and enhances fine motor skills. Drawing also boosts mental health by reducing stress. It helps you express emotions and ideas visually. Plus, it is fun and fulfilling.
Basic Materials Needed
Starting to draw requires a few basic materials. Here’s a simple list:
- Pencils: Use different types like HB, 2B, and 4B for shading.
- Paper: Sketchpads or plain white paper work well.
- Eraser: A good eraser is essential for correcting mistakes.
- Pencil Sharpener: Keep your pencils sharp for precise lines.
| Material | Purpose |
|---|---|
| Pencils | Drawing and shading |
| Paper | Surface for drawing |
| Eraser | Correcting mistakes |
| Pencil Sharpener | Maintaining sharp pencil tips |
Once you have these basic materials, you are ready to start drawing. Remember, practice is key. Keep drawing, and you will see improvement over time.
Getting Started
Starting to draw can feel overwhelming, but it doesn’t have to be. Begin with easy steps and build your confidence. In this section, you will find simple guidelines to help you start drawing effortlessly. Follow these steps to make your initial drawing experience enjoyable and productive.
Choosing Simple Subjects
Choosing the right subjects to draw is crucial. Start with simple objects like fruits, flowers, or basic shapes. These subjects are easy to replicate and give a solid foundation for beginners.
- Apples and bananas
- Sunflowers and daisies
- Circles, squares, and triangles
Simple subjects are less intimidating and help in improving your observational skills. As you progress, try more complex subjects.
Understanding Basic Shapes
Understanding basic shapes is key to drawing. Most objects can be broken down into simple shapes.
| Object | Basic Shapes |
|---|---|
| House | Square, triangle |
| Tree | Rectangle, circle |
| Car | Rectangle, circles |
Break down each subject into its basic shapes. This method simplifies the drawing process. You can add details once the basic shapes are in place.
Practice drawing these shapes repeatedly. It helps in improving your hand-eye coordination and builds muscle memory.
Remember, practice is essential. Keep your drawings simple at first and gradually add more details as you become more confident.
Step-by-step Techniques
Learning to draw can seem daunting at first. But breaking it down into simple steps makes it much easier. In this section, we will explore step-by-step techniques to help you draw. These methods will guide you from the initial outlines to the final details.
Starting With Outlines
Begin by drawing basic shapes. These shapes form the foundation of your drawing. For example, use circles for heads and rectangles for bodies. Keep the lines light so you can easily adjust them.
Here’s a simple table of basic shapes for common objects:
| Object | Shape |
|---|---|
| Head | Circle |
| Body | Rectangle |
| Arms | Lines |
Adding Details Gradually
Once your basic shapes are in place, start adding details. Focus on one part at a time. Begin with the eyes when drawing a face. Then, move to the nose and mouth.
Here are steps to add details:
- Eyes: Add small circles for pupils inside the head circle.
- Nose: Draw a small triangle or oval below the eyes.
- Mouth: Place a curved line beneath the nose.
Continue adding details to other parts. For the body, add clothes, hands, and fingers.
Remember to keep your lines light at first. You can darken them later once you are satisfied with the shape and details.

Credit: www.pinterest.com
Practicing Lines And Curves
Practicing lines and curves is a crucial step in learning to draw. It helps in developing control and precision in your hand movements. Mastering this skill will make your drawings look clean and professional. In this section, we will focus on drawing straight lines and curved lines. Let’s dive in and explore these basic yet essential elements of drawing.
Drawing Straight Lines
Start by holding your pencil comfortably. A relaxed grip ensures smooth lines. Place your pencil on the paper. Use your wrist and arm to move the pencil. Try drawing a straight line from one point to another. Practice this several times. Gradually, your lines will become straighter and more confident.
Another technique is to draw lines between two dots. Place two dots on your paper. Connect them with a straight line. Repeat this exercise with different distances. This will help in improving your control.
Mastering Curved Lines
Drawing curved lines requires a different approach. Start with simple curves. Draw a series of “C” shapes on your paper. Focus on smooth, flowing movements. Don’t worry about perfection. The key is to practice regularly.
Next, try drawing loops and spirals. These shapes are a bit more complex. They will challenge your control and coordination. Keep your hand relaxed. Use your wrist and arm to guide the pencil. With time, your curves will become more consistent.
Finally, combine straight and curved lines. Draw shapes like circles, ovals, and spirals. This will enhance your skills and prepare you for more advanced drawings. Remember, practice is the key. The more you practice, the better you get.
Creating Depth And Dimension
Creating depth and dimension in your drawings can make them more realistic. This process involves using shading and highlights to give the illusion of space and volume. Understanding these techniques will improve your artwork significantly.
Shading Techniques
Shading adds depth to your drawings. Start by identifying the light source. This will determine where the shadows fall. Use light, medium, and dark tones to create a gradient. A smooth transition between these tones will make your drawing look more three-dimensional.
Cross-hatching is another effective shading technique. Draw parallel lines close together. Then add another layer of lines at an angle. The closer the lines, the darker the shade. Practice different angles and line densities to see what works best.
Adding Highlights
Highlights are areas where light hits directly. These spots are usually the brightest parts of your drawing. Use an eraser or white pencil to create highlights. Place them carefully to match your light source. This contrast between light and dark adds dimension.
For a more subtle effect, use a blending stump. It can soften the edges of your highlights. This will make them look more natural. Remember, less is more. Too many highlights can flatten your drawing.
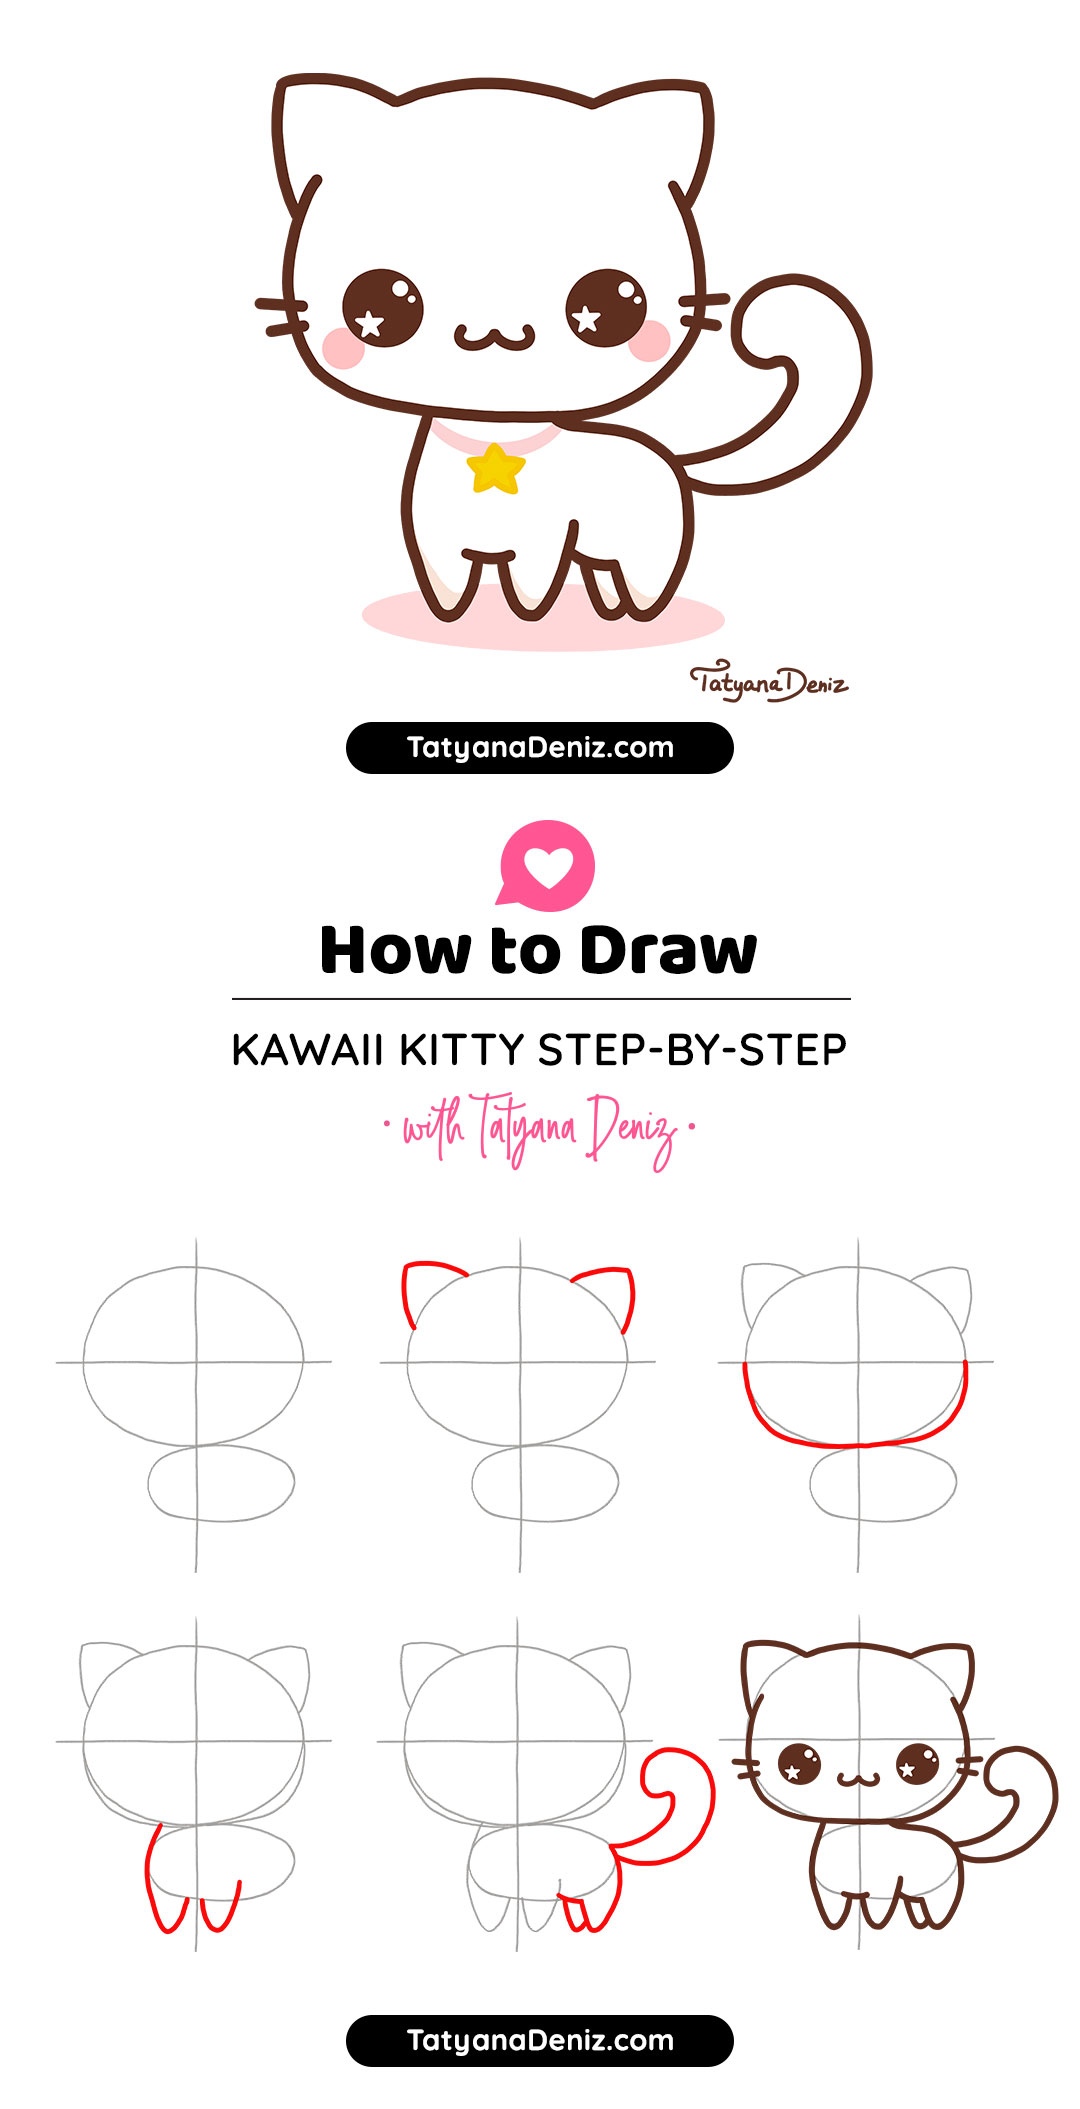
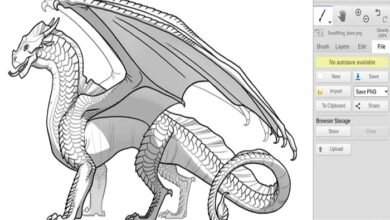
Credit: tatyanadeniz.com
Exploring Different Styles
Exploring different drawing styles can be a fun journey. Each style offers unique challenges and rewards. Whether you enjoy the whimsical charm of cartoons or the intricate details of realistic drawings, there’s a style for everyone. Here, we’ll delve into two popular styles: Cartoon and Anime, and Realistic Drawings.
Cartoon And Anime
Cartoon and anime drawings are popular among beginners. They are easy to start with and very expressive. Cartoons often have exaggerated features and simple lines. Anime, a style from Japan, focuses on big eyes and detailed hair. Both styles allow for creativity and personal expression.
To start, draw simple shapes. Circles for heads, ovals for bodies. Add details like eyes, nose, and mouth. Keep practicing to refine your characters. Look at your favorite shows for inspiration. Notice the different styles and techniques. This will help you improve and find your unique style.
Realistic Drawings
Realistic drawings require more observation and patience. You aim to capture real life in your art. Start with basic shapes to outline your subject. Pay attention to proportions and details. Shadows and highlights are crucial in realistic drawings.
Practice drawing from photos or real objects. Take your time to study the details. Notice how light affects the object. This will help you create depth and realism. Use soft pencils for shading and blending. This adds a lifelike quality to your drawings. Keep practicing and be patient. Progress comes with time and effort.
Common Mistakes To Avoid
Drawing can be a fun and rewarding hobby. But beginners often make common mistakes that can hinder their progress. In this section, we will discuss some of these mistakes and how to avoid them. By being aware of these pitfalls, you can improve your drawing skills more quickly.
Overcomplicating Drawings
One of the most common mistakes is overcomplicating drawings. Beginners often try to add too many details too soon. This can make the drawing look messy and overwhelming.
Start simple. Focus on basic shapes and forms. Gradually add details as you gain confidence. Use light strokes to outline your drawing before adding depth and texture.
Remember, even professional artists start with simple sketches. Keep your early drawings clean and basic. This way, you’ll build a solid foundation for more detailed work later.
Ignoring Proportions
Another common mistake is ignoring proportions. Proper proportions are essential for creating realistic and balanced drawings. Beginners sometimes make parts of their drawings too large or too small.
Use guidelines. Drawing light lines to mark the proportions of your subject can be very helpful. For example, if you are drawing a face, divide it into sections for the eyes, nose, and mouth.
Observe real-life objects and note their proportions. Practice drawing from life whenever possible. This will help you develop a better understanding of how to capture accurate proportions in your drawings.
| Common Mistake | How to Avoid |
|---|---|
| Overcomplicating Drawings | Start with basic shapes and add details gradually. |
| Ignoring Proportions | Use guidelines to ensure accurate proportions. |
By avoiding these common mistakes, you can make your drawing process smoother and more enjoyable. Keep practicing, and you’ll see improvement over time.

Credit: www.pinterest.com
Tips For Continuous Improvement
Drawing is a journey of continuous improvement. Whether you are a beginner or have some experience, there are always ways to enhance your skills. Consistency and feedback are key elements in this journey. Below, we will explore how daily practice and seeking feedback can help you improve your drawing abilities.
Daily Drawing Practice
Make drawing a daily habit. Even a few minutes each day can lead to improvement. Set aside a specific time each day for drawing. Use this time to explore new techniques. Try different subjects. Practicing regularly helps in developing muscle memory. It also boosts confidence. Keep a sketchbook with you. This will make it easy to draw anytime. Track your progress by dating your sketches. This will help you see your improvement over time.
Seeking Feedback
Feedback is essential for growth. Share your work with others. Join art communities or groups. These can be online or in-person. Look for constructive criticism. This helps you understand your strengths and areas for improvement. Don’t be afraid to ask for specific feedback. For example, ask about your shading or proportions. Learn from others’ experiences. Observe their techniques. Apply their advice to your own work. Remember, every artist was once a beginner. Feedback helps you grow.
Frequently Asked Questions
How To Start Drawing Step By Step?
Begin with simple shapes like circles and squares. Gradually add details to these basic shapes. Use light pencil strokes for easy adjustments.
What Are The Best Tools For Beginners?
Start with a pencil, eraser, and paper. As you progress, explore colored pencils, markers, and sketchpads.
How To Draw Realistic Eyes Step By Step?
Begin with the eye’s basic shape. Add the iris, pupil, and eyelid. Include shading for depth and realism.
Can Anyone Learn To Draw Easily?
Yes, anyone can learn to draw with practice and patience. Follow step-by-step guides to improve skills progressively.
Conclusion
Drawing can be fun and easy with practice. Follow each step carefully. Take your time. Enjoy the process. Mistakes are part of learning. Keep drawing and you’ll improve. Show your work to friends and family. Get their feedback. This will help you grow.
Remember, every artist starts as a beginner. Stay patient and keep practicing. Happy drawing!