
Easy Steps to Draw: Master Art with Simple Techniques
Drawing can seem challenging, but it doesn’t have to be. With simple steps, you can create beautiful art.
Are you ready to learn how to draw with ease? This guide will walk you through the process, making it simple and fun. Whether you are a beginner or want to improve your skills, these steps will help you. Drawing is a great way to express creativity and relax.
You don’t need fancy tools or special talent. Just follow these easy steps, and you will see improvement. Let’s start this artistic journey together and discover the joy of drawing.

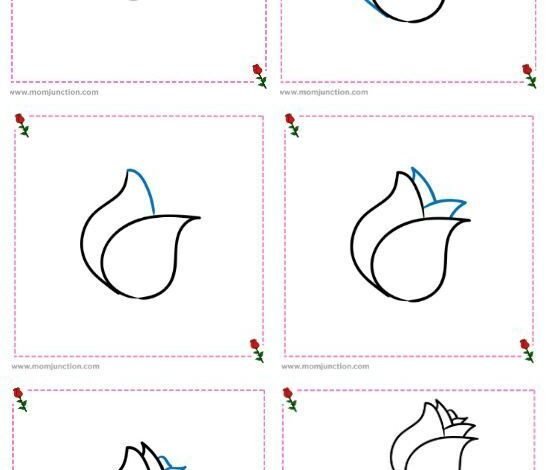
Credit: www.pinterest.com
Introduction To Simple Drawing
Drawing is a fun and rewarding activity. You can express yourself creatively. Starting with simple techniques is a great way to begin. This will build confidence and skills over time. Simple drawing is accessible to everyone, even beginners.
Why Start With Simple Techniques
Starting with simple techniques helps you learn the basics. These techniques are easier to practice. They do not overwhelm you with details. You can see progress quickly. This keeps you motivated to continue.
Simple techniques teach you fundamental skills. These skills are the foundation of more complex drawings. You will learn to observe and replicate shapes. You will understand proportions and perspective better.
Benefits Of Mastering Basic Skills
Mastering basic skills improves your overall drawing ability. You will have a stronger foundation. This makes it easier to tackle more complex subjects. Your confidence will grow as you see improvement.
Basic skills also improve your hand-eye coordination. This is important for drawing accurately. You will develop muscle memory. This helps in creating smoother lines and shapes.
With basic skills, you can experiment more. You will feel more comfortable trying new things. This leads to more creativity and enjoyment.
Choosing The Right Tools
Every artist knows that the right tools can make a big difference. With the right supplies, drawing becomes easier and more enjoyable. Let’s explore some essential tools and budget-friendly options.
Essential Drawing Supplies
Start with a good set of pencils. Different grades of pencils offer various shades and textures. You will need both hard and soft pencils. A quality eraser is also crucial. It helps in correcting mistakes without damaging the paper.
Next, get some good drawing paper. The paper quality affects your drawing. Choose a smooth or textured paper based on your preference. Also, invest in a sharpener. A sharp pencil ensures precise lines.
Last, consider getting a ruler and a blending stump. A ruler helps with straight lines and proportions. A blending stump assists in shading and blending techniques.
Budget-friendly Options
Drawing does not have to be expensive. There are many affordable supplies that work well. Look for student-grade pencils. They are cheaper but still good quality.
Buy a standard eraser and a basic sharpener. These do not cost much but are essential. For paper, you can use printer paper for practice. It is affordable and easily available.
Consider buying supplies in sets. Sets often cost less than individual items. Look for sales and discounts at local stores. You can find good deals without spending a lot.
Basic Shapes And Lines
Drawing can seem daunting at first, but it starts with basic shapes and lines. Mastering these fundamentals lays the groundwork for more complex artwork. By learning to draw simple shapes and lines, you can create detailed and realistic drawings with ease.
Drawing Simple Shapes
Begin with basic shapes like circles, squares, and triangles. These shapes form the building blocks of most drawings. For a circle, draw a continuous round line. Squares and rectangles require straight lines, meeting at right angles. Triangles need three straight lines connecting to form three corners.
Practice drawing these shapes repeatedly. The more you practice, the better your hand control becomes. With improved control, your shapes will become more accurate.
Creating Lines And Curves
Lines are the foundation of any drawing. Start with straight lines. Use a ruler if necessary. Draw lines in various directions: horizontal, vertical, and diagonal. This exercise helps you understand line placement and angle.
Next, move on to curves. Curves add fluidity and life to your drawings. Practice drawing wavy lines, spirals, and loops. Curves can be tricky, so take your time. With practice, you’ll create smooth and consistent curves.
Mastering lines and curves allows you to draw more complex shapes and figures. Combine these elements to create detailed and intricate drawings.
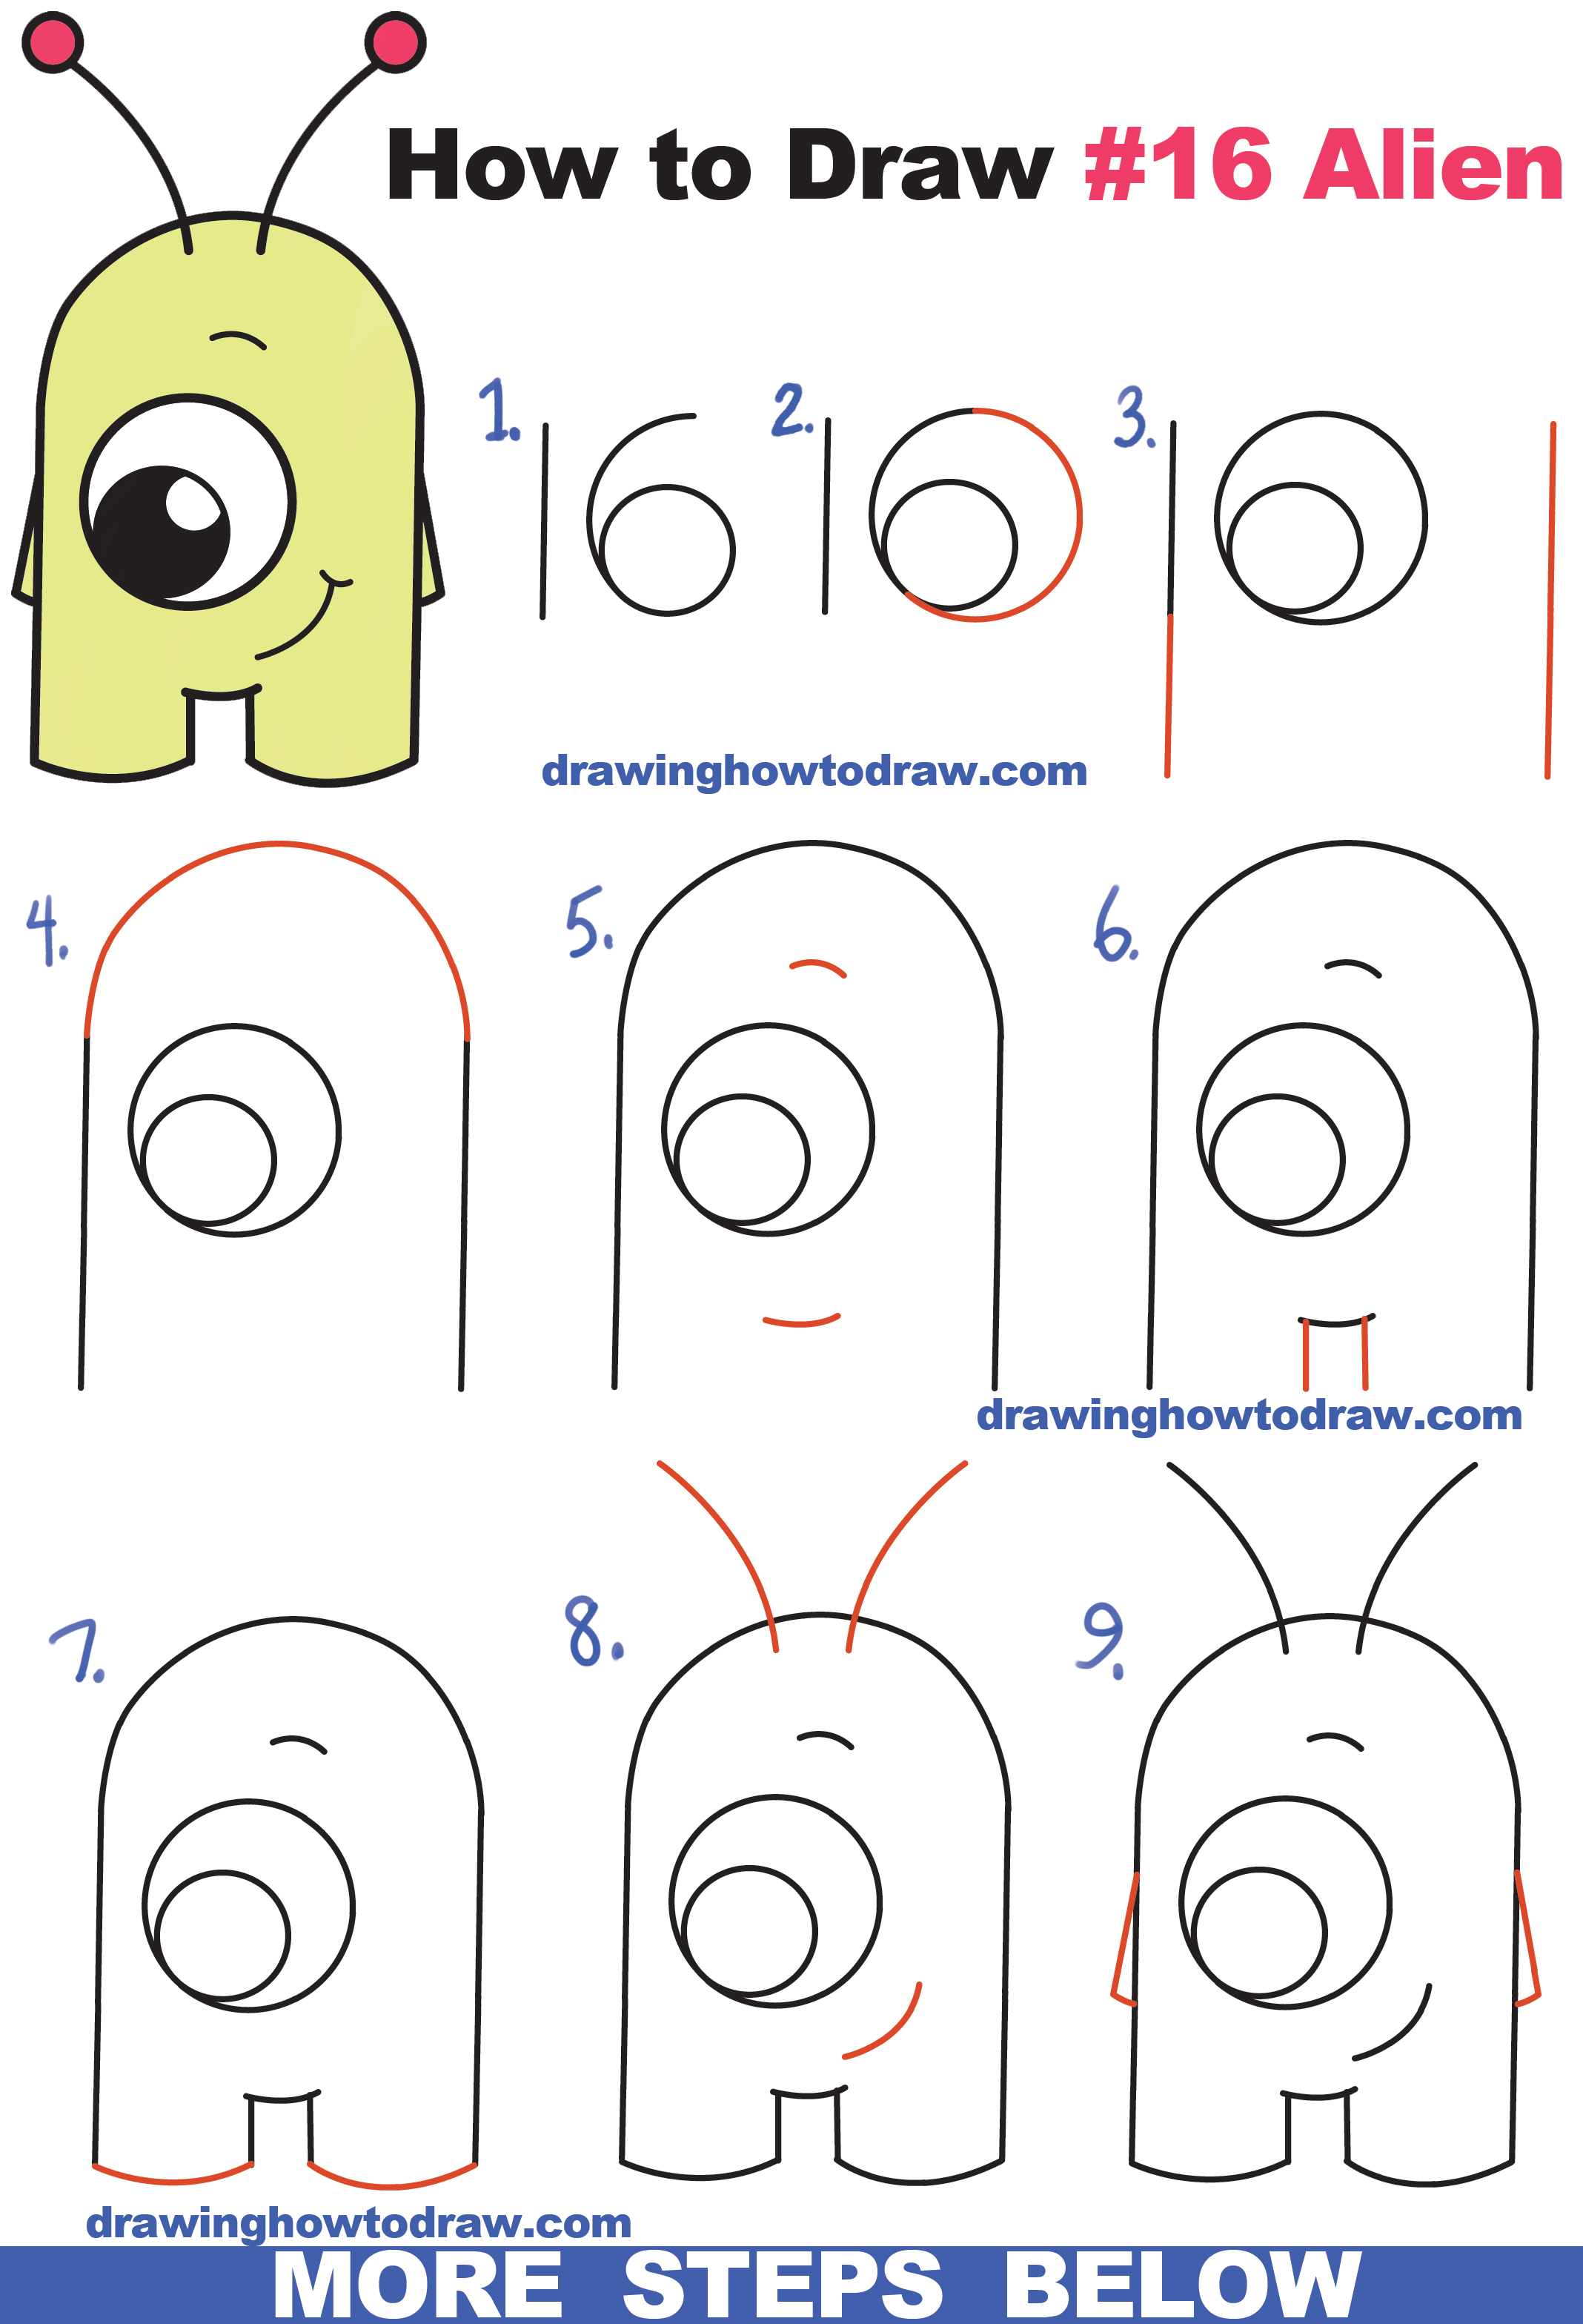
Credit: www.drawinghowtodraw.com
Understanding Proportions
Understanding proportions is crucial in drawing. It helps create balanced and realistic artwork. When you get proportions right, your drawings look more accurate. This section will guide you through the basics and some handy techniques.
Basics Of Proportion
Proportion in drawing means comparing sizes. You compare one part of your drawing to another. For example, the head to the body. Keeping these sizes correct makes your drawing look real. Start with simple shapes. Use circles, squares, or rectangles to map out your drawing. This helps in maintaining correct proportions.
Using Grids To Maintain Proportions
Grids are useful for keeping proportions accurate. Draw a grid on your paper. Then, draw the same grid on your reference image. This helps you match each part of your drawing to the right place. It ensures that your drawing stays proportional. Grids break down complex images into simple, manageable parts. They help you focus on one section at a time.
Shading Techniques
Shading can transform a simple drawing into a realistic masterpiece. It adds depth, texture, and life to your art. By understanding different shading techniques, you can create stunning effects. Let’s explore some easy steps to master shading.
Introduction To Shading
Shading is an essential skill in drawing. It helps in creating a sense of depth and realism. The way you shade can change the entire look of your drawing. Start with basic techniques and practice regularly. Different shading styles can be used to show various textures and light effects.
Here are some common shading techniques:
- Hatching: Drawing parallel lines to create shade.
- Cross-Hatching: Drawing intersecting sets of parallel lines.
- Stippling: Using dots to create shade.
- Blending: Smudging or blending pencil marks.
Creating Depth With Shadows
Shadows play a key role in making your drawing look three-dimensional. They show how light interacts with objects. To create depth, observe the light source in your scene. Shade the opposite side of the light source darker.
Follow these steps to create realistic shadows:
- Identify the light source direction.
- Shade the areas opposite to the light source.
- Use different pressure levels on your pencil for varying darkness.
- Blend the shaded areas for a smooth transition.
Here is a simple table to show different pencil pressure levels:
| Pressure Level | Resulting Shade |
|---|---|
| Light | Soft and light shade |
| Medium | Moderate shade |
| Heavy | Dark and intense shade |
Experiment with different shading techniques and observe the effects. Practice is key. Your shading will improve with time. Keep experimenting and have fun!
Adding Textures
Adding textures to your drawings can bring them to life. Textures give your artwork depth and realism. They can make a flat image look three-dimensional. Let’s explore some easy steps to add textures to your drawings.
Simple Texture Techniques
Start with basic strokes. Use short, quick lines to create rough textures. Long, smooth lines make surfaces look polished. Try cross-hatching. Draw parallel lines in one direction, then cross them with more lines. This technique adds shading and depth. Experiment with dots. Stippling creates texture using small dots. The closer the dots, the darker the texture. Vary your pressure. Pressing harder with your pencil makes darker, more defined textures.
Incorporating Textures In Drawings
Consider the material you are drawing. Wood has rough, uneven lines. Metal appears smooth and reflective. Observe real-life textures. Study how light and shadow affect surfaces. Use reference photos for accuracy. Combine different textures. Mix rough and smooth areas for contrast. Layer your textures. Build up from light to dark. This technique adds depth. Practice regularly. The more you practice, the better your textures will look.
Drawing From Observation
Drawing from observation is a crucial skill for any artist. It involves carefully studying your subject and capturing its details on paper. This method helps improve your accuracy and attention to detail. Whether you are a beginner or an experienced artist, practicing observational drawing can enhance your skills and give you a better understanding of form, proportion, and perspective.
Tips For Observational Drawing
- Start with simple shapes: Break down complex objects into basic shapes. This makes it easier to draw accurately.
- Focus on proportions: Pay attention to the size and relationship between different parts of your subject.
- Use guidelines: Draw light lines to help you align different elements of your drawing.
- Observe the light and shadow: Notice where the light hits your subject and where the shadows fall. This adds depth to your drawing.
- Take your time: Don’t rush. Spend time observing and capturing details.
- Practice regularly: The more you practice, the better you get.
Practice With Everyday Objects
Practicing with everyday objects is a great way to improve your observational drawing skills. These objects are readily available and can be found around your home. Here are some steps to get started:
- Choose a simple object: Start with something like a cup, a book, or a fruit. These objects have basic shapes and are easy to draw.
- Set up your workspace: Place your object on a table with good lighting. Make sure you have a comfortable place to sit.
- Observe your object: Look at the object from different angles. Notice its shape, size, and details.
- Start with a rough sketch: Use light lines to draw the basic shape of the object.
- Add details: Gradually add more details to your drawing. Pay attention to textures, patterns, and shadows.
- Refine your drawing: Go over your lines to make them clearer. Add shading to give your drawing depth.
By following these steps and practicing regularly, you will see improvement in your observational drawing skills. Remember, the key is to observe carefully and practice often. Happy drawing!
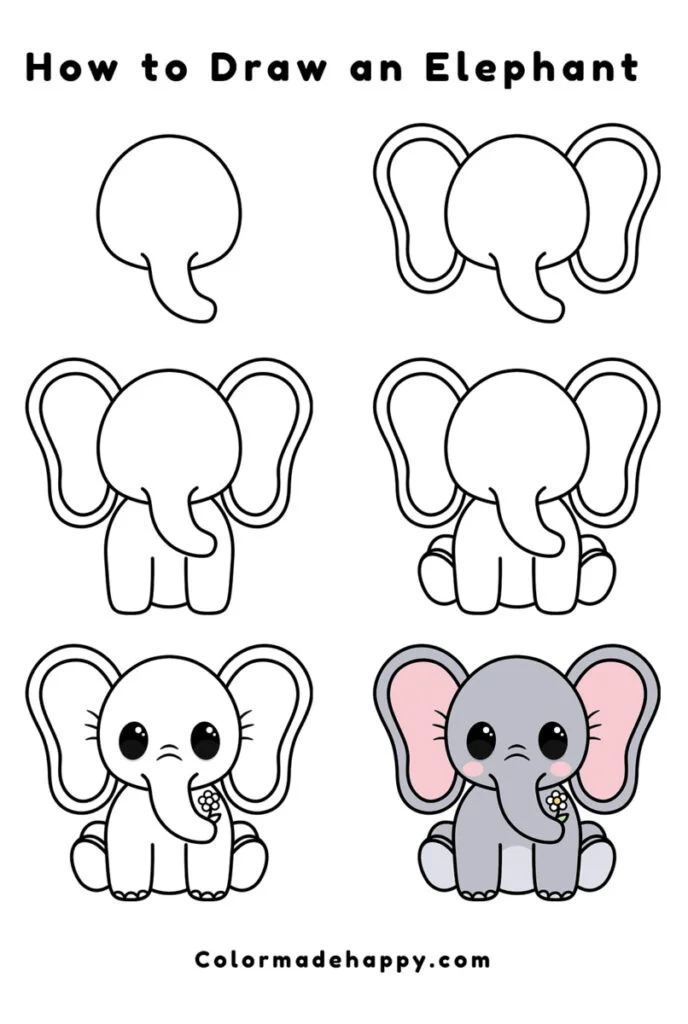
Credit: colormadehappy.com
Bringing It All Together
Finally, it’s time to bring all the drawing techniques you’ve learned together. This is the step where your practice and patience pay off. By combining different techniques, you can create a finished piece that is both detailed and expressive.
Combining Techniques
Start by outlining your drawing. Use light strokes to create the basic shape. This will serve as the foundation for your work.
Next, layer in shading to add depth. Use a variety of pressures and strokes to create light and dark areas. This will give your drawing a more three-dimensional look.
Consider cross-hatching for texture. This involves drawing intersecting lines to create shadow and form. It’s a great way to add detail without making your drawing look too busy.
You can also use stippling for finer details. This technique involves using small dots to create texture and shading. It’s perfect for adding subtle touches to your drawing.
Creating A Finished Piece
Once you have combined your techniques, step back and look at your drawing. Check for balance and proportion. Make adjustments as needed.
Next, refine your lines. Go over your initial sketch with darker, cleaner lines. This will make your drawing stand out.
Use an eraser to remove any unwanted marks. Clean up your work to give it a polished look.
Finally, add any final details. This could include highlights, additional textures, or small touches that bring your drawing to life.
Here’s a simple checklist to ensure your drawing is complete:
- Outline is clear and balanced
- Shading adds depth
- Textures are detailed
- Lines are refined
- Unwanted marks are removed
- Final details are added
By following these steps, you can create a finished piece that showcases your skills and creativity.
Frequently Asked Questions
What Tools Do I Need To Start Drawing?
To start drawing, you need paper, pencils, an eraser, and a sharpener. Additionally, having a ruler and colored pencils can be helpful.
How Do I Draw Basic Shapes?
Start by drawing simple shapes like circles, squares, and triangles. Practice these until you feel comfortable. They are the foundation of more complex drawings.
What Are Some Easy Things To Draw?
Begin with easy subjects like flowers, trees, and simple animals. These are great for beginners. They help you develop basic skills and confidence.
How Can I Improve My Drawing Skills?
Practice regularly and experiment with different techniques. Study drawings by other artists and learn from tutorials. Consistency is key to improvement.
Conclusion
Drawing can be easy with the right steps. Start small. Practice often. Keep your tools handy. Follow these steps, and soon, you will see improvement. Don’t stress over perfection. Enjoy the process. Drawing is fun and relaxing. Share your art with friends.
Celebrate your progress. Remember, every artist starts as a beginner. Happy drawing!