Mastering Drawing with Kleki Art: A Step-by-Step Guide for Beginners and Experts
Drawing Kleki Art is an exciting and versatile way to express your creativity using a simple yet powerful digital tool. Kleki is an online drawing application that allows artists of all skill levels to create stunning pieces of digital artwork. Whether you are a beginner looking to explore the basics or an experienced artist seeking a lightweight digital canvas for more complex creations, drawing with Kleki Art can offer a rewarding experience.
In this guide, we’ll take a deep dive into the various aspects of drawing Kleki Art, from getting started with the tool to mastering advanced techniques. You’ll learn how to use Kleki’s unique features, discover tips to improve your drawings, and explore the possibilities of digital art creation with this powerful web-based application.
Getting Started with Kleki Art: A Beginner’s Guide
Before you dive into the world of drawing Kleki Art, it’s important to understand the basic features of the tool. Kleki Art is an online painting platform that offers a variety of brushes, layers, and customizable settings to enhance your drawing experience. Whether you’re using it for sketches or detailed artwork, the first step is getting familiar with its interface.
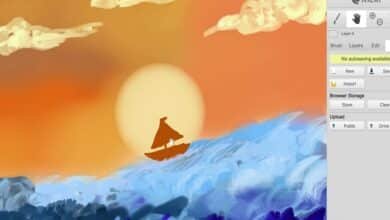
To start drawing Kleki Art, simply visit the official Kleki website, where you can begin a new project with just a click. The user interface is intuitive and easy to navigate, with options for different brush types, opacity controls, and the ability to undo mistakes with a simple tap. You can also adjust the canvas size, add new layers, and even export your drawings for further use. Once you’re comfortable with the basics, you’re ready to explore more advanced drawing techniques.
Key Features of Kleki Art: Exploring the Tools
Drawing Kleki Art comes with several features that can enhance your creative process. These include an array of brushes, customizable settings, and layers, which allow you to experiment and create unique artwork. Here’s a breakdown of the essential tools available in Kleki Art:
- Brushes: Kleki Art offers various brushes for different effects, such as pencil, ink, watercolor, and airbrush. You can adjust the size and opacity of each brush to suit your artistic style.
- Layers: One of the most useful features in Kleki Art is the ability to create multiple layers. This allows you to separate different parts of your artwork, making it easier to edit and refine each element without affecting the rest of the image.
- Color Palette: Kleki Art includes a color palette with a wide range of colors, and you can also create custom colors. You can adjust the hue, saturation, and brightness to get the perfect shade.
- Eraser and Undo/Redo Functions: The eraser tool helps you fix mistakes, while the undo and redo buttons allow you to correct errors without losing progress.
- Export Options: Once your artwork is complete, Kleki allows you to export your drawing in various formats, including PNG and JPG, to share with others or print.
These features make drawing Kleki Art a flexible and enjoyable experience for artists of all levels.
Advanced Drawing Techniques in Kleki Art
While drawing Kleki Art is accessible for beginners, it also offers advanced features for more experienced users. By mastering advanced techniques, you can create more detailed and professional-looking artwork. Here are some tips to enhance your drawing skills with Kleki Art:
- Using Layers for Depth and Detail: Layers are a powerful tool in Kleki Art. They allow you to build up your artwork in stages, which is especially useful for adding shadows, highlights, and textures. Start by sketching on the first layer, then use additional layers for coloring, shading, and detailing.
- Blending and Shading: To create smooth transitions between colors, use the blending brush or adjust the opacity of your existing brushes. Shading is essential to give your drawings depth and realism, and Kleki Art’s brushes make it easy to achieve soft, blended effects.
- Texturing Your Artwork: Kleki Art offers various brushes that simulate textures like watercolor, pencil strokes, and pastels. Experiment with different textures to create interesting effects in your drawings. You can also use layers to add texture to specific areas without affecting the entire piece.
- Customizing Brushes: Kleki allows you to modify brushes to suit your style. You can change the shape, size, and opacity of each brush, which can significantly impact your drawing technique. Custom brushes can help you achieve unique effects, such as stippling, cross-hatching, or smudging.
- Using Shortcuts for Efficiency: Once you get the hang of drawing Kleki Art, using keyboard shortcuts can help you work more efficiently. For example, pressing “Ctrl+Z” (or “Cmd+Z” on a Mac) allows you to undo mistakes quickly, while “Ctrl+Shift+Z” (or “Cmd+Shift+Z”) lets you redo actions.
By mastering these techniques, you can take your Kleki Art drawings to the next level and create sophisticated digital art.
Tips and Tricks for Improving Your Drawing Skills with Kleki Art
No matter your experience level, there’s always room for improvement when it comes to drawing Kleki Art. Here are some tips and tricks to help you develop your skills:
- Practice Sketching Regularly: The more you practice sketching, the better you’ll become at capturing shapes, proportions, and details. Use Kleki Art to practice daily, experimenting with different brushes and tools.
- Experiment with Color Palettes: Kleki Art gives you the freedom to explore color combinations. Don’t be afraid to experiment with different palettes to see what works best for your drawings. Try using complementary or analogous colors for harmony, or experiment with bold, contrasting hues for a more dynamic look.
- Study Real-World References: To improve your drawing accuracy, study real-world references. Whether it’s a photograph, a still life, or a landscape, observing how light and shadows interact in the real world will help you replicate those effects in your digital art.
- Take Advantage of the Undo Function: Don’t worry about making mistakes. Kleki Art’s undo function lets you fix errors without losing your progress, allowing you to experiment freely without fear of ruining your drawing.
- Join the Kleki Art Community: Online communities can be an excellent source of inspiration and feedback. Share your drawings, get advice from fellow artists, and learn from others who are also passionate about digital art.
By incorporating these strategies into your drawing practice, you’ll continue to grow as an artist and develop your unique style in Kleki Art.
Common Challenges When Drawing with Kleki Art and How to Overcome Them
While drawing with Kleki Art is fun and rewarding, there can be challenges along the way. Here are some common problems that users may encounter, along with tips on how to overcome them:
- Lagging or Slow Performance: If Kleki Art runs slowly on your device, try closing other browser tabs or programs to free up resources. Additionally, reduce the canvas size to improve performance on lower-end devices.
- Inaccurate Brush Strokes: If you’re finding that your brush strokes aren’t as smooth as you’d like, try adjusting the brush settings. Lowering the opacity or changing the brush type can help create smoother, more fluid lines.
- Difficulty with Layer Management: Managing multiple layers can become tricky if you have too many. Try organizing your layers by naming them or grouping them together for easier navigation.
- Limited Canvas Size: Kleki Art offers a fixed canvas size, which may be limiting for larger projects. If you need a larger workspace, consider creating your artwork in sections and later combining them in an image editing software.
- Exporting Issues: If you’re having trouble exporting your artwork, make sure you’ve saved it correctly in the desired format. Additionally, check your browser’s settings to ensure that your downloads are not blocked.
By addressing these challenges, you can ensure a smoother experience while drawing Kleki Art.
Conclusion
Drawing Kleki Art is a powerful and accessible way to express your artistic vision. Whether you’re just starting out or looking to refine your skills, Kleki provides an intuitive platform with a variety of tools to bring your ideas to life. From mastering layers and brushes to experimenting with color and texture, the possibilities for creating beautiful artwork are endless.
By practicing regularly, exploring new techniques, and learning from other artists, you can continue to improve your digital art skills and produce professional-quality drawings. Kleki Art is an excellent tool for anyone who wants to explore the world of digital art, and with time and dedication, you can become a proficient and confident artist.
FAQs
1. What is Kleki Art?
Kleki Art is an online drawing tool that allows users to create digital artwork using a variety of brushes, layers, and customizable settings.
2. Can I use Kleki Art for free?
Yes, Kleki Art is completely free to use, making it an accessible platform for both beginners and experienced artists.
3. How do I save my drawing in Kleki Art?
Once you’re satisfied with your artwork, you can save it by clicking the “Save” button and exporting it in formats like PNG or JPG.
4. Can I create detailed artwork with Kleki Art?
Yes, Kleki Art offers advanced tools such as layers and customizable brushes, making it possible to create highly detailed and complex artwork.
5. Is Kleki Art suitable for beginners?
Absolutely! Kleki Art is user-friendly and offers a variety of tools that can be easily understood by beginners while still providing advanced options for more experienced artists.