
Mastering Kleki Paint Tools: A Comprehensive Guide for Digital Artists
In the world of digital art, finding the right software and tools to bring your creative vision to life can be an overwhelming task. Among the various options available, Kleki stands out as a simple yet powerful online drawing and painting tool. It’s accessible, free to use, and offers a variety of painting tools that are perfect for both beginners and advanced digital artists alike.
In this blog post, we will explore Kleki paint tools in depth, guiding you through the features, techniques, and tips to help you make the most out of your Kleki painting experience. Whether you’re just starting or you’re looking for ways to refine your digital art skills, this guide will provide valuable insights on how to use Kleki’s features effectively.
Kleki Paint Tools: An Overview
Before diving into the specifics of each tool, it’s important to first understand what Kleki paint tools offer. Kleki is a browser-based art platform that provides a straightforward and easy-to-use interface with powerful digital painting tools. Unlike many other professional digital painting programs that require installations or subscriptions, Kleki is available directly from your web browser, making it an accessible tool for everyone.
The toolset of Kleki includes a variety of brushes, colors, layers, and blending options that mimic traditional art materials like pencils, paint, and markers. These paint tools are designed to provide the freedom of creative expression, whether you’re sketching simple designs or creating more complex artwork.
Getting Started with Kleki Paint Tools: A Step-by-Step Guide
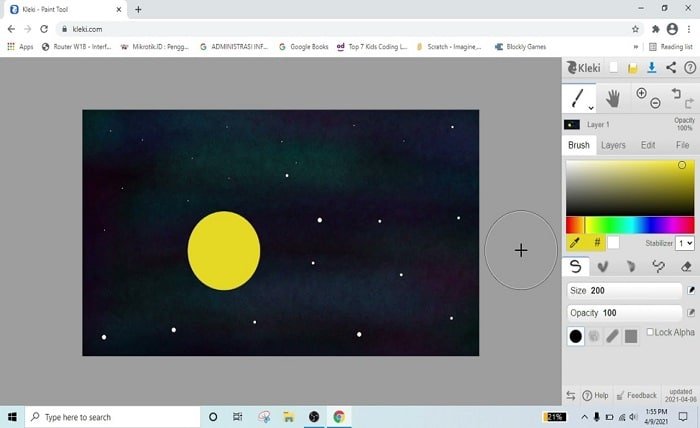
Getting started with Kleki paint tools is incredibly simple. Here’s a step-by-step guide to help you set up and begin your digital artwork using Kleki.
- Opening Kleki: To start, visit the Kleki website on your browser. You don’t need an account or sign-in to begin, though you can choose to save your artwork if needed.
- Choosing a Canvas Size: Once you’re in, select the canvas size that best fits your project. Kleki allows you to adjust the dimensions easily.
- Selecting Paint Tools: Kleki offers a variety of paint tools, including pencils, brushes, airbrushes, and more. Select the one that fits your current artistic needs.
- Starting Your Artwork: Begin drawing or painting on the canvas using your selected tools. Adjust the brush size, opacity, and flow to get the desired effect.
- Using Layers: Layers are an essential feature in digital art. Kleki allows you to work with multiple layers, giving you more flexibility in your designs.
Exploring the Different Types of Brushes in Kleki Paint Tools
Kleki paint tools provide a wide range of brushes that cater to different styles of artwork. Whether you’re creating a detailed portrait, abstract piece, or landscape, Kleki has a brush for every need.
- Pencil Brush: Ideal for sketching, the pencil brush offers a soft, textured look similar to traditional pencil drawings. This tool is great for outlines, shading, and light sketches.
- Paintbrush: For more vibrant strokes, the paintbrush tool mimics the flow of real paint. You can adjust its size and opacity to create everything from delicate washes to bold, expressive strokes.
- Airbrush: The airbrush in Kleki provides a smooth, gentle spray of color, making it perfect for gradient work and soft, subtle effects.
- Marker: The marker tool is perfect for bold, saturated colors. It is particularly useful when you want to create thick, vibrant lines or fill in areas of your drawing.
- Blender Brush: To create smooth transitions and blend different colors, the blender brush tool is ideal. This tool helps you create a more polished and cohesive look to your artwork.
By experimenting with these various brushes and their settings, you can achieve unique effects that closely mimic traditional media or develop your own digital painting style.
Layers and Their Importance in Kleki Paint Tools
One of the most powerful features of Kleki paint tools is the ability to work with layers. Layers are crucial for digital artists, allowing you to separate different elements of your artwork for easier editing and adjustments.
In Kleki, layers function much like they do in other digital painting programs. You can add, delete, merge, and adjust layers as needed. Each layer operates independently, meaning you can work on specific parts of your artwork without affecting the rest.
Here’s how you can use layers effectively:
- Creating Layers: Start by adding a new layer for each element of your artwork. For example, you might want one layer for your sketch, another for coloring, and a third for shading or details.
- Layer Opacity: Adjust the opacity of each layer to create transparent effects or to ensure that colors blend naturally.
- Merging Layers: Once you’re satisfied with the composition of your artwork, you can merge layers to reduce the file size or finalize your design.
By using layers wisely, you can create more complex and detailed artwork without the fear of ruining your design if something goes wrong.
Customizing Your Kleki Paint Tools for Better Control
One of the standout features of Kleki paint tools is the ability to customize the tools to suit your artistic style and preferences. You can modify various settings to get the precise control you need for different techniques.
- Adjusting Brush Size and Flow: By changing the size of your brush, you can create fine details or broad strokes. Additionally, adjusting the flow setting will control how much paint is applied with each stroke.
- Opacity Control: The opacity slider allows you to control the transparency of your brush, enabling you to build up layers of color gradually or make bold, solid strokes.
- Pressure Sensitivity: If you’re using a tablet or stylus, Kleki offers pressure sensitivity, which adjusts the thickness and opacity of your strokes based on how hard you press.
These customization options give you complete control over your artwork, allowing you to experiment with different styles and techniques.
Tips and Tricks for Using Kleki Paint Tools Effectively
To make the most out of Kleki paint tools, here are some tips and tricks that can help enhance your digital artwork:
- Use Keyboard Shortcuts: Kleki offers several keyboard shortcuts that can speed up your workflow, such as undo (Ctrl+Z), redo (Ctrl+Y), and switching between tools.
- Create Custom Brushes: Kleki allows you to create your own custom brushes, which can give you a unique touch for your artwork. Experiment with different brush settings to design a brush that fits your artistic vision.
- Use Color Palettes: Kleki includes a built-in color palette that allows you to quickly select and adjust colors. Save your favorite colors to easily switch between them as you work.
- Work in Full-Screen Mode: To get the most out of your workspace, try switching to full-screen mode. This will give you more room to focus on your artwork without distractions.
- Save Your Work Frequently: While Kleki is online and offers easy access, it’s essential to save your progress regularly to avoid losing your artwork.
By incorporating these tips into your workflow, you can increase efficiency and improve the overall quality of your artwork.
Conclusion
Kleki paint tools are an excellent option for both beginners and seasoned digital artists. With an intuitive interface, customizable features, and a variety of brushes, it provides everything you need to create stunning digital artwork. Whether you’re sketching, painting, or working on a more detailed project, Kleki offers the flexibility and control necessary to bring your artistic ideas to life.
Its easy accessibility and powerful features make it a fantastic tool for anyone looking to explore digital painting without the need for expensive software or hardware. If you haven’t already tried Kleki, now is the perfect time to dive in and start experimenting with the various tools and techniques available.
FAQs
1. What makes Kleki paint tools different from other painting software?
Kleki stands out because it is browser-based, free to use, and offers a simple yet effective range of painting tools. It doesn’t require installation, making it easily accessible.
2. Can I use Kleki on any device?
Yes, Kleki is compatible with most modern web browsers, meaning you can use it on a desktop, laptop, or tablet with internet access.
3. Does Kleki offer a way to save my artwork?
Yes, Kleki allows you to save your work directly to your computer or store it as a .png or .jpeg file.
4. Can I use a tablet or stylus with Kleki?
Yes, Kleki supports pressure sensitivity, making it an excellent choice for artists using a tablet or stylus to create digital artwork.
5. Is Kleki suitable for professional artists?
While Kleki is designed to be user-friendly for beginners, many professional artists also use it for quick sketches, doodles, or for its accessibility. However, for more advanced features, some may prefer to use more robust programs like Photoshop or Corel Painter.