Mastering the Art of How to Draw Kleki: A Step-by-Step Guide

In the digital art world, software tools have revolutionized how we create and express ourselves visually. One such tool that has gained popularity among artists and creators is Kleki. Whether you’re an aspiring artist or a seasoned professional looking to explore new techniques, learning how to draw with Kleki can significantly enhance your skills. Kleki is a versatile, free digital drawing tool that allows you to create artwork right in your browser. This guide will walk you through the process of using Kleki to draw, offering tips, tricks, and step-by-step instructions to help you master this innovative platform.
What is Kleki and How Does It Work?
When diving into the world of digital art, it’s essential to understand the tools you’re working with. Kleki is a free online painting and drawing application that provides a wide range of tools for creating stunning artwork. Unlike some other digital art software, Kleki doesn’t require any installation and works directly within your browser, making it easily accessible for anyone with an internet connection.
The platform allows users to draw, paint, and create digital masterpieces using layers, brushes, and other artistic tools. Understanding how to draw with Kleki begins with exploring its user-friendly interface. From the toolbar at the top to the canvas area, everything is designed for easy navigation, which is particularly helpful for beginners.
To start drawing on Kleki, simply go to the website, select your brush, and begin sketching. Kleki provides various brush types and settings that you can adjust to suit your style. The platform also supports pressure sensitivity for those using stylus-equipped devices, which makes it ideal for creating more detailed and refined artwork.
Getting Started with Kleki: Your First Drawing
Now that you know what Kleki is and how it works, let’s jump into how you can use it to create your first piece of artwork. Learning how to draw with Kleki involves a few simple steps to get started:
- Access the Kleki Website:
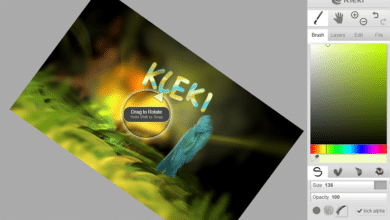
Visit the Kleki homepage (https://kleki.com), and you’ll be greeted with a clean, simple interface that encourages exploration. The canvas is ready for you to start drawing. - Set Up Your Canvas:
Before you begin, choose the dimensions of your canvas. Kleki offers several preset canvas sizes or you can customize your own. Larger canvases provide more space for detailed work, while smaller ones may be perfect for sketches or quick drawings. - Choose Your Brush Tool:
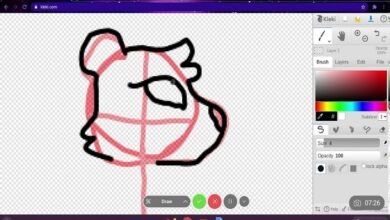
Kleki offers a variety of brush tools, each with different textures and effects. You can experiment with brushes like the pencil, airbrush, or paintbrush to find one that suits your drawing style. Adjust the size and opacity of the brush for more control. - Begin Drawing:
Once you’ve selected your brush, you can start sketching directly on the canvas. You can use the eraser tool to remove mistakes, adjust the color palette, and add different layers to separate elements of your drawing. - Save Your Work:
Kleki allows you to save your drawings in various formats, including PNG and JPEG. You can also save your work to continue editing it later, making it a flexible option for artists working on long-term projects.
Exploring Kleki’s Key Features for Drawing
As you become more familiar with how to draw with Kleki, it’s important to explore its key features, which can elevate your artwork and creative process. Here are some essential tools and functionalities that will help you get the most out of the platform:
- Layering System:
One of Kleki’s most useful features is its layering system. Layers allow you to separate different elements of your drawing, making it easier to edit and refine. For example, you could have one layer for the background, another for the character, and another for shading. - Brush Customization:
Kleki provides users with the ability to adjust brush settings, including size, opacity, flow, and blending mode. This gives you the flexibility to create different textures and effects in your artwork. You can also save custom brush settings for consistent results in future projects. - Undo and Redo Options:
Like many digital drawing tools, Kleki offers undo and redo functions. This is especially useful when experimenting with new techniques or trying out different styles. - Pressure Sensitivity:
If you’re using a drawing tablet or stylus, Kleki supports pressure sensitivity. This allows you to vary the thickness and opacity of your brush strokes depending on how hard you press, mimicking the experience of traditional media. - Color Palette:
Kleki features an easy-to-use color palette that enables you to select and mix colors. The color wheel, RGB sliders, and presets make it easy to find the perfect shade for your artwork. - Gradient Tool:
The gradient tool in Kleki helps you create smooth transitions between colors, adding depth and complexity to your drawings. This tool is ideal for creating backgrounds, lighting effects, and shading.
Tips for Improving Your Drawings on Kleki
Learning how to draw with Kleki is just the first step. To truly excel and create stunning pieces of artwork, it’s important to continuously improve your skills. Here are some tips to help you elevate your drawing techniques:
- Use Layers Effectively:
Layers allow you to separate different elements of your drawing, so use them to your advantage. Keep the background on one layer, the character on another, and any effects or shading on separate layers. This will help you edit each element individually without affecting the others. - Experiment with Blending Modes:
Kleki offers several blending modes for your brushes, which can create unique effects by combining different colors and layers. Experiment with these modes to discover new ways of adding texture, highlights, and shadows to your work. - Use the Zoom Feature:
Don’t be afraid to zoom in and focus on details in your drawing. Zooming in allows you to refine intricate areas like facial features, clothing folds, and shading. - Practice Shading and Highlighting:
Mastering shading and highlighting techniques can bring your artwork to life. Use soft brushes and varying opacity to create realistic light and shadow effects. Experiment with gradients and blending modes to achieve smoother transitions between light and dark areas. - Use Custom Brushes:
Kleki offers a variety of brushes, but you can also create your own custom brushes. Experiment with different textures and shapes to add unique effects to your drawings.
Advanced Drawing Techniques in Kleki
Once you’re comfortable with the basics of how to draw with Kleki, you can move on to more advanced techniques that will give your artwork depth and complexity.
- Layer Masks:
Layer masks allow you to hide or reveal parts of a layer without permanently erasing any content. This technique is especially useful when working with intricate details, as it allows you to refine your work without the fear of making irreversible changes. - Using Reference Images:
Kleki makes it easy to import reference images onto your canvas. Use this feature to study anatomy, proportions, or color schemes, which can improve the accuracy and realism of your artwork. - Brush Textures:
To add extra depth to your artwork, use textured brushes or create your own custom textures. These brushes can mimic the feel of traditional media, such as charcoal or watercolor, giving your digital artwork a more organic look. - Pixel Art:
Kleki is also great for creating pixel art. Use the pencil tool and zoom in to create each pixel manually, or use the grid feature to maintain perfect proportions. - Digital Painting:
For those looking to create detailed digital paintings, Kleki offers tools like the smudge tool and various brush settings to blend colors smoothly. Use multiple layers to build up the painting gradually, adding details and refining the image as you go.
Conclusion
Learning how to draw with Kleki is an exciting and rewarding process for both beginners and experienced artists. With its accessible interface, wide range of tools, and support for advanced techniques, Kleki offers a powerful platform for creating stunning digital artwork. Whether you’re drawing for fun or working on more professional pieces, Kleki provides the flexibility and functionality needed to bring your creative vision to life.
By following the steps outlined in this guide and continuously experimenting with different techniques, you can enhance your skills and become proficient in using Kleki for digital drawing. Keep practicing, exploring new features, and pushing your artistic boundaries to create unique and beautiful artwork!
FAQs
- What is Kleki?
Kleki is a free online drawing and painting tool that allows users to create digital artwork using a variety of brushes, layers, and other features. - Is Kleki suitable for beginners?
Yes, Kleki’s user-friendly interface and simple tools make it an excellent choice for beginners. - Can I use Kleki offline?
Kleki is an online tool, so it requires an internet connection to use. However, you can save your artwork and access it later. - What are the key features of Kleki?
Kleki’s key features include a layering system, customizable brushes, pressure sensitivity, color palette, and gradient tool. - Can I use Kleki for digital painting?
Yes, Kleki is great for digital painting. It offers various brushes and tools that can help you create detailed, painterly artwork.